While hunting for vintage Halloween recipes I came across a very interesting magazine published in the 1880s and 1890s.
Ingall’s Home and Art Magazine was a monthly publication out of Massachusetts about fine art, decorating, cooking and a wide variety of other topics. The three most common categories include Brush Studies, Easy Lessons in Art and Domestic Helps. There’s a little bit of everything in there, from poetry and opinion pieces to biographical sketches of artists and detailed instructions for drawing with charcoal and mixing paint.
In my research I found very little solid information about Ingall’s Home and Art Magazine. It appears to have been published monthly, but is better known for its annual collections printed in numbered volumes. I did find an announcement in an 1895 volume of The Writer: A Monthly Magazine for Literary Workers that J. Fred Ingalls sold his magazine to publisher W. N. Hartshorn and it was absorbed by another women’s art and home magazine called The Modern Priscilla (1887-1930).
The Recipe

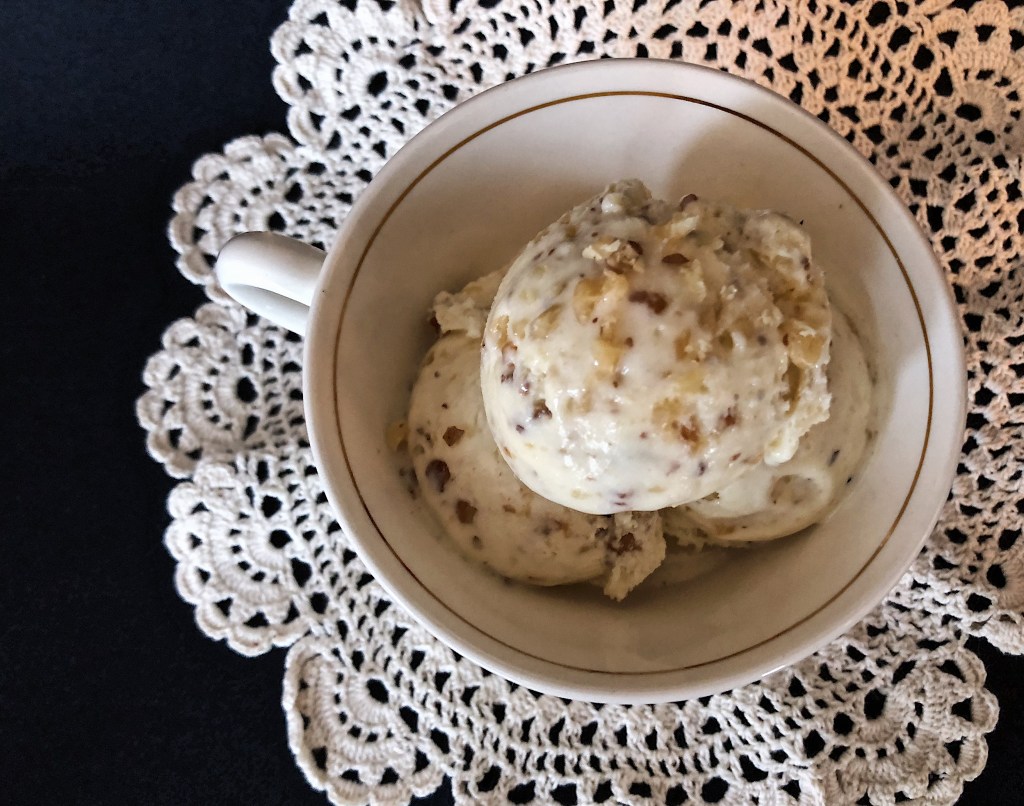
This ice cream recipe comes from Ingall’s Volume 4 (1891) in an entire section about Halloween. Both walnut and chocolate ice cream were on the menu, though the magazine only had the recipe for walnut. For practical reasons I cut the measurements in half, but you are welcome to adjust according to your needs.
To learn more about what a typical Halloween might have been like around this time, check out the detailed history found in my article about Hallowe’en Pumpkin Pie.
Walnut Ice Cream


Ingredients
- 2 cups milk
- 4 egg yolks
- 1 cup sugar
- 1/2 tsp. salt
- Additional 1/2 cup sugar
- 2 cups heavy cream
- 2 cups finely chopped walnuts
Beat together a quart of milk, yolks of eight eggs and two cups of sugar. Cook in a double boiler stirring steadily till as thick as rich, sweet cream. When cold, add a teaspoonful of salt, a cup of sugar, a quart of cream or very rich milk (half cream if possible), the meats from a quart of English walnuts chopped fine. Freeze the usual way. An excellent cream to follow an elaborate supper, and to use left over yolks from cake, etc.
Step ONE: The Custard
Beat together the milk, egg yolks and 1 cup of sugar. Cook on medium to medium low in a double boiler until the custard thickens enough to coat the back of a spoon or reaches 170 degrees.
If, like me, you do not have a double boiler and never intend to actually buy one, fake it. To do this, fill the bottom of a saucepan with some water and place a bowl or second saucepan on the top. Be sure that the bowl will fit inside the saucepan without touching the water at the bottom. The point of using the double boiler here is to cook the custard without using direct heat.
Set your custard aside and let it cool to room temperature. Once cool, put the bowl on ice until it is cold. Modern methods usually suggest chilling the ice cream base in the fridge for a few hours or even overnight but I didn’t do that because the recipe doesn’t instruct us to. Whichever you choose, don’t move on to the next step until your custard is cold.
Step TWO: Add Flavor
Add the salt, the remaining 1/2 cup sugar, heavy cream and walnuts.
If you are using an ice cream maker, now is the time to add your mix to the machine and follow the manufacturer’s instructions.
Step THREE: Freezing
Now this is where things start getting interesting.
I was intrigued by the recipe’s instructions to “freeze the usual way.” What IS the usual way in 1891?
You may or may not be aware that there is a lot of science behind making ice cream. Ice cream has to churn in order to aerate/whip the cream and it must freeze gradually to break up the ice crystals. Otherwise you end up with a hard block of unappetizing crystallized cream product, which just isn’t ice cream.
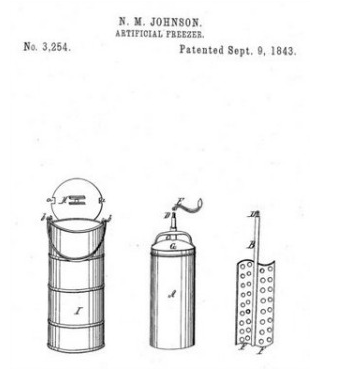
As it turns out, ice cream machines did exist in 1891. They were shockingly similar in design to our modern machines but they required significantly more manual labor. Commercial ice cream churns and freezers were used by confectioners in ice cream shops but it is possible that a home chef with the means might have actually owned some kind of smaller, insulated hand-cranked churn like this one invented and patented by Nancy M. Johnson in 1843:
But what about the households without access to an “artificial freezer?” Electric refrigerators weren’t available until after 1927. Ice cellars and quality ice boxes certainly kept things nice and cold, but were not always reliable enough to get the job done. So how would your average Victorian housewife freeze and harden ice cream?
Well, she might have created her own little insulated churn using ice delivered by the local ice man (or woman). Sources say the ice cream was put in a jar and placed in a basin filled with salted ice. The jar would be covered by a cloth or thick paper with a slit big enough to fit a hand-cranked egg mixer through. Every few minutes she would crank the mixer until it was frozen, which would take some time. Eventually it would be whipped into a beautifully creamy ice cream and left to harden in the ice box.
Freezing Instructions
I don’t own an ice cream maker so I had no choice but to make ice cream the old-fashioned way with manual labor. So if you have neither a machine nor a desire to go full Victorian with an ice basin, sturdy jar and hand-cranked mixer then follow these only slightly modernized instructions:
Pour your cream into a freezer-safe container with a lid. Whip with a hand mixer or in a blender then freeze for 30-45 minutes. Remove the container and whip the ice cream again, being sure to scrape off the hardened cream from the edges. You can use a hand mixer but I almost prefer using a spoon or a spatula. Put the ice cream back in the freezer and freeze for another 30 minutes. Whip again vigorously and repeat the freezing process. Do this every 20-30 minutes until the ice cream is frozen, or about the consistency of soft serve. This will probably take 3-4 hours. Leave it in the freezer to harden completely.
The Verdict

This ice cream really is delicious. It is very rich and very sweet, but I do like the walnut flavor a lot. I was also surprised by how soft and creamy the texture is, especially when done entirely by hand! It is also worth noting that this could technically be considered a frozen custard by modern FDA standards, not “ice cream.”
Everyone who sampled the ice cream genuinely enjoyed it. My neighbor, who often receives unsolicited historic food deliveries, also really liked it and pointed out that it tastes almost like cold and creamy divinity, which is among her favorite desserts!
I will definitely be making this again, but I’m seriously considering buying an ice cream maker. I would probably get a vintage-style machine that uses the ice basin because I really like the texture of this ice cream. Freezing it by hand isn’t difficult, it just takes a really long time. It is, however, a quick way to appreciate modern conveniences!

Sources
- Grahn, Emma. Keeping your (food) cool: From ice harvesting to electric refrigeration. National Museum of American History. April 29, 2015.
- Hills, William H. and Robert Luce. The Writer: A Monthly Magazine for Literary Workers, Volume 8. The Writer Publishing Company. 1895. E-Book.
- Ingalls, J. F. Ingall’s Home and Art Magazine, Volume 4. 1891. E-Book.
- Krondi, Michael. Sweet Invention: A History of Dessert. Chicago Review Press. 2011. Print. pg. 329-330
- Legends and Myths of Ices and Ice Cream History. What’s Cooking America. Accessed Sept, 2019.

Reblogged this on Dave Loves History and commented:
This sounds amazing…
LikeLiked by 1 person
Reblogged this on Nick's sitet.
LikeLike
Ice cream
LikeLike
This is so nice, loved the history and the recipe. Look forward to read more of your works in the coming days. Great job keep it up.
LikeLiked by 1 person
Thank you!
LikeLiked by 1 person